NodeMCU is a microcontroller based on ESP8266 WiFi chip. You can program it in two programming languages LUA and C. I strongly recommend programming in C with Arduino IDE, because community is much more developed, we can use more available libraries and tutorials.
Preparing Arduino IDE environment
The development environment can be downloaded from https://www.arduino.cc/en/software by selecting your operating system. After downloading and installation it is time to first run.
Once the environment is up and running it is ready to work with Arduino boards, to be able to program NodeMCU we need to take some extra steps.
First, go to (Arduino -> preferences). In the field Additional Boards Manager URLs, we need to paste the URL:
http://arduino.esp8266.com/stable/package_esp8266com_index.jsonThen click OK.
The next step is to install the boars, to do this go to the Boards Manager (Tools -> Board: … -> Boards Manager …). In the search, enter esp8266 and then Install.
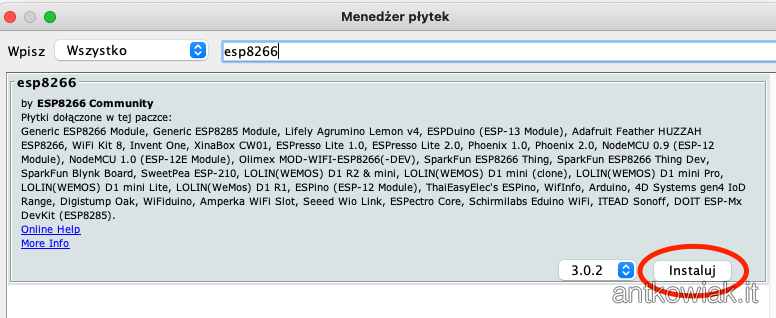
When the installation is successful, we can try to program our NodeMCU board. To do this, connect the board with a USB cable to the computer.
After connecting, select the appropriate board (Tools -> Board: … -> ESP8266 Boards -> NodeMCU 0.9 (ESP-12 Module))
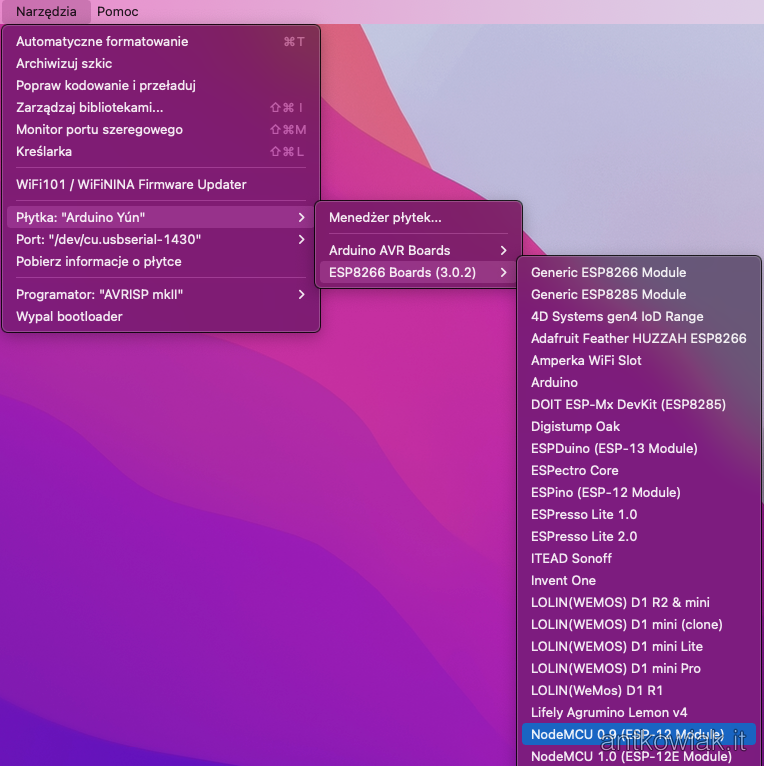
After selecting the board, select the port to which our board is connected. The easiest way to do this is to disconnect and connect the microcontroller to the computer and check which port appears in (Tools -> Port: …). In my case it is /dev/cu.usbserial-1430.
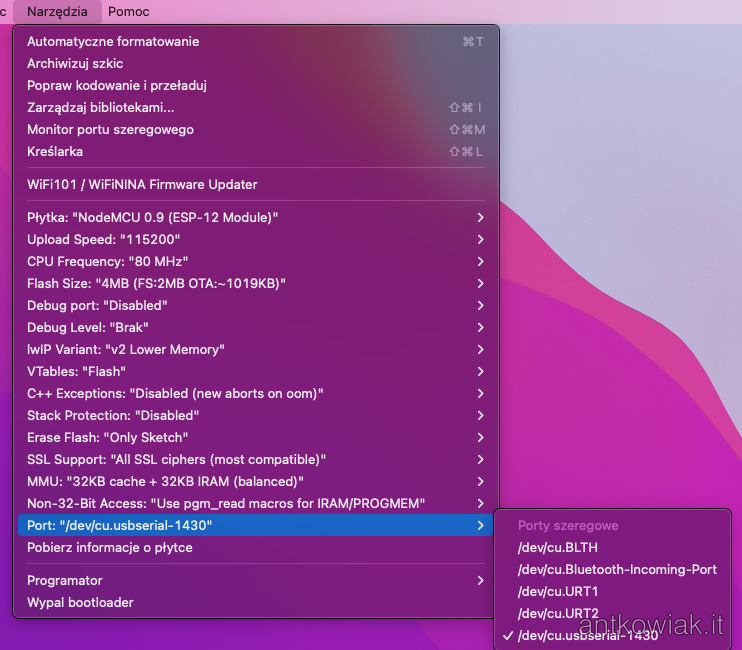
Uploading a test program
Most of the guides are based on the Blink program (i.e. blinking the LED built into the board). We will try to do it in a different way, namely typing the phrase cyclically on the serial port and reading it using the serial monitor.
W polu tekstowym wpisujemy poniższy kod:
void setup() {
  Serial.begin(9600);
}

void loop() {
  Serial.println("Ailve");
  delay(2000);
}
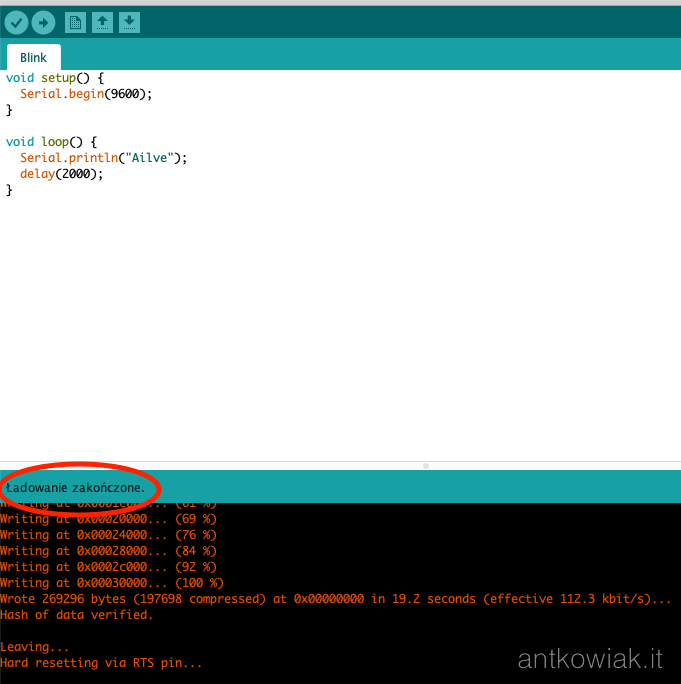
After making sure that we have selected the right board and inserting the code into the text field, we can try to program the microcontroller using the right arrow on the top bar of the application.
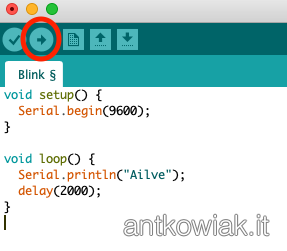
After successful programming, we will get the message Done uploading.
Serial port monitoring
To read the information sent by the microcontroller through the serial port, enter (Tools -> Serial Monitor).
At the bottom, select the appropriate speed, in our case it is 9600 baud. After selecting the appropriate speed, we should receive an Alive message every two seconds.
What’s next?
In the next post I will present how to connect to the NodeMCU to the WiFi network. The next steps will be to connect the DHT22 temperature and humidity sensor and add readings to Domoticz.